
hardware requirements
A 165Hz refresh rate updates your screen 165 times every second. Moving from 60Hz to 165Hz makes motion look smoother and cuts down on blur. You'll notice it most in fast games, but even moving your mouse across the desktop feels more responsive.
To take advantage of 165Hz, you need a few things. First, a monitor that actually supports 165Hz. This seems obvious, but it’s worth stating. Second, a graphics card capable of outputting that refresh rate. Most modern GPUs from NVIDIA, AMD, and Intel can handle 165Hz without issue, but older cards might struggle. And now, you’ll need Windows 12. While the process is similar to Windows 11, there are tweaks under the hood that make this guide specific to the latest operating system.
The connection between your graphics card and monitor is also key. DisplayPort generally provides more bandwidth than HDMI, making it the preferred choice for high refresh rates, especially at higher resolutions. While HDMI 2.1 can support 165Hz at 1440p and even 4K, you’ll need to ensure both your monitor, graphics card, and cable all support the HDMI 2.1 standard. A cheap or damaged cable can easily limit your refresh rate, even if everything else is correct. Don’t underestimate the importance of a good cable.
check your current refresh rate
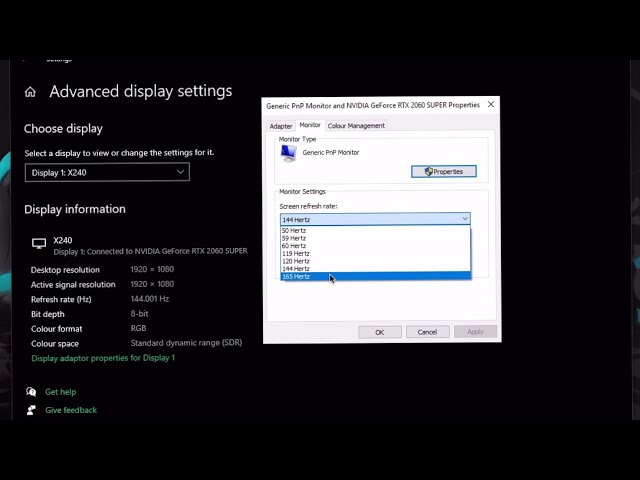
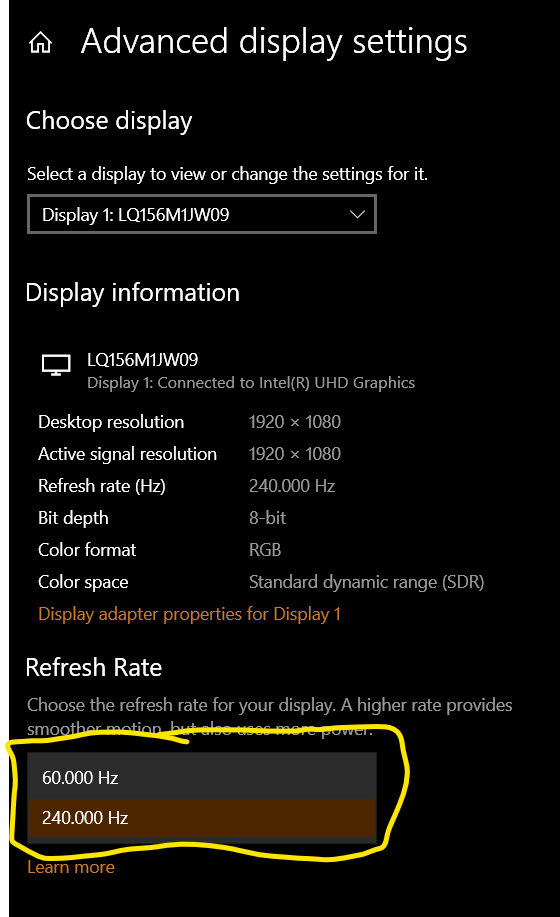
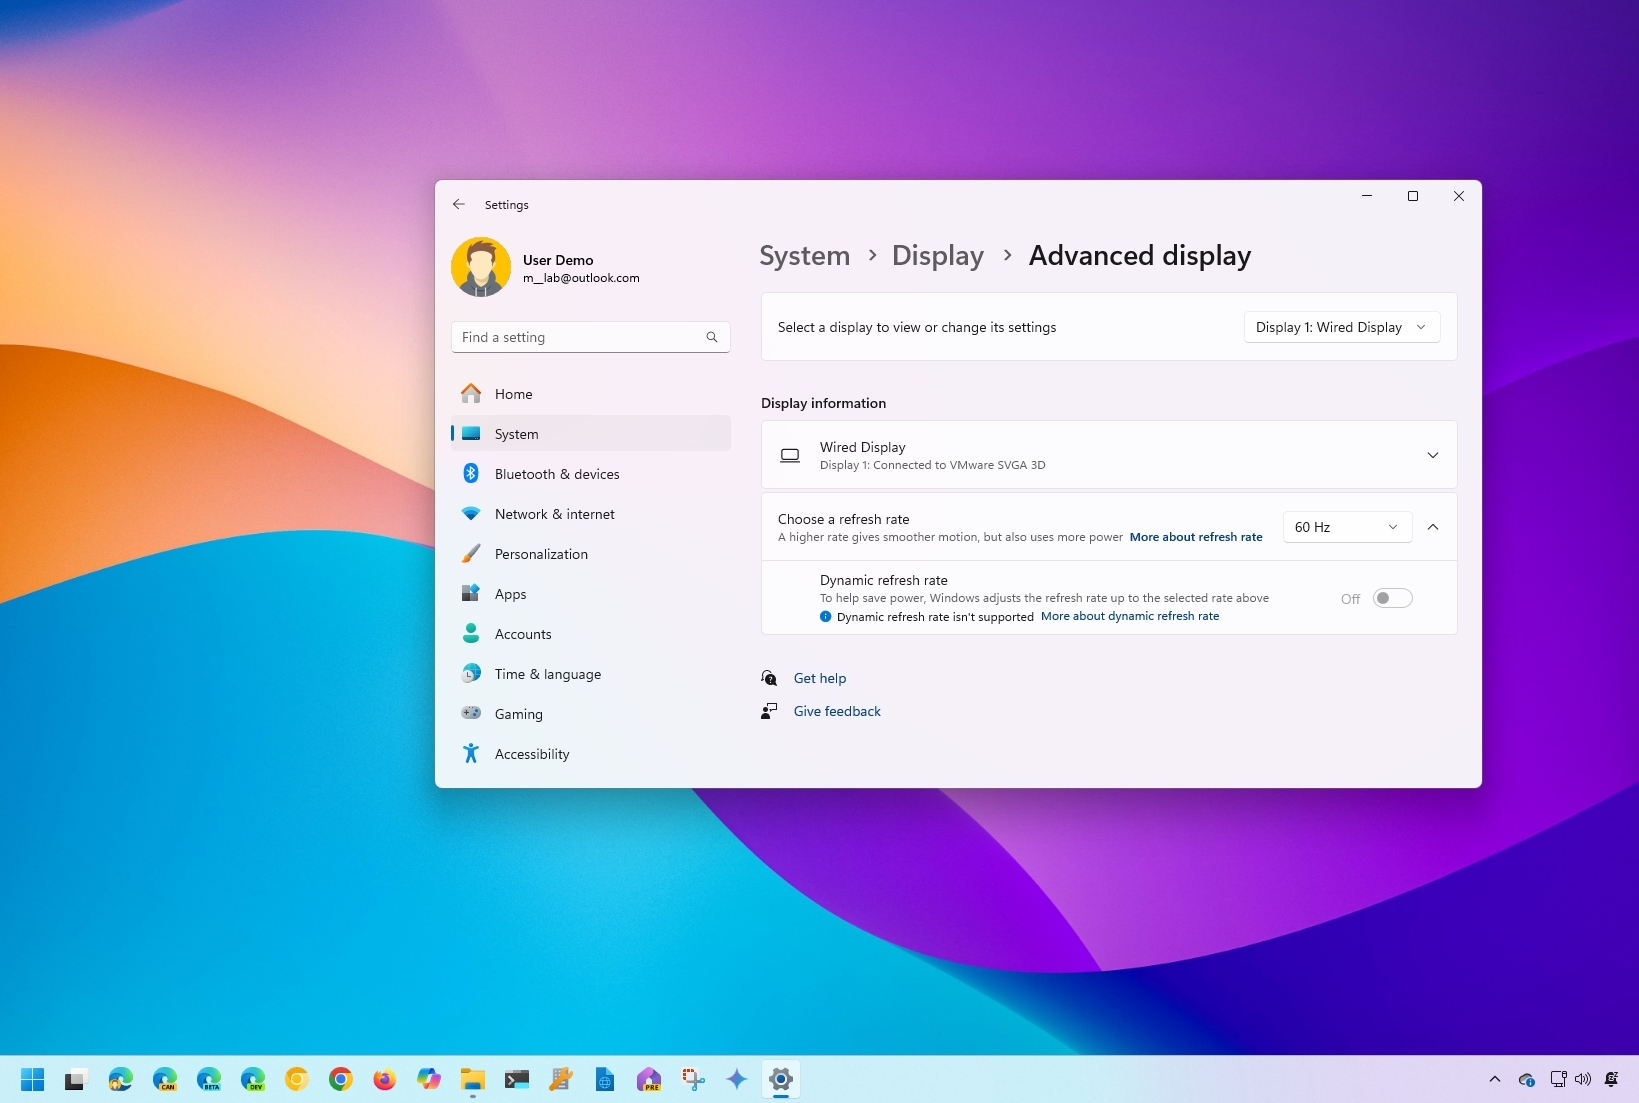
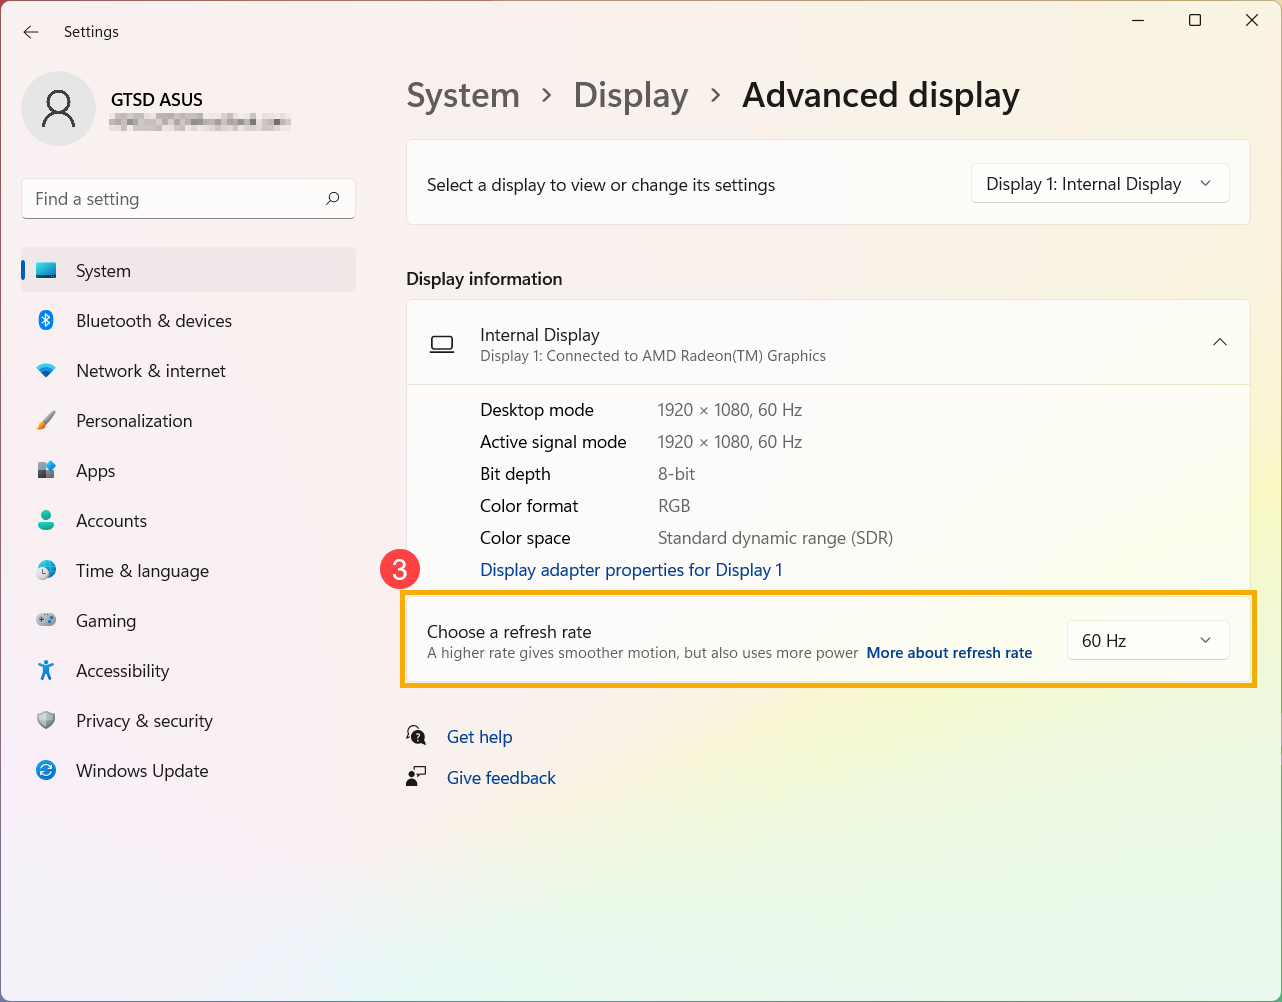
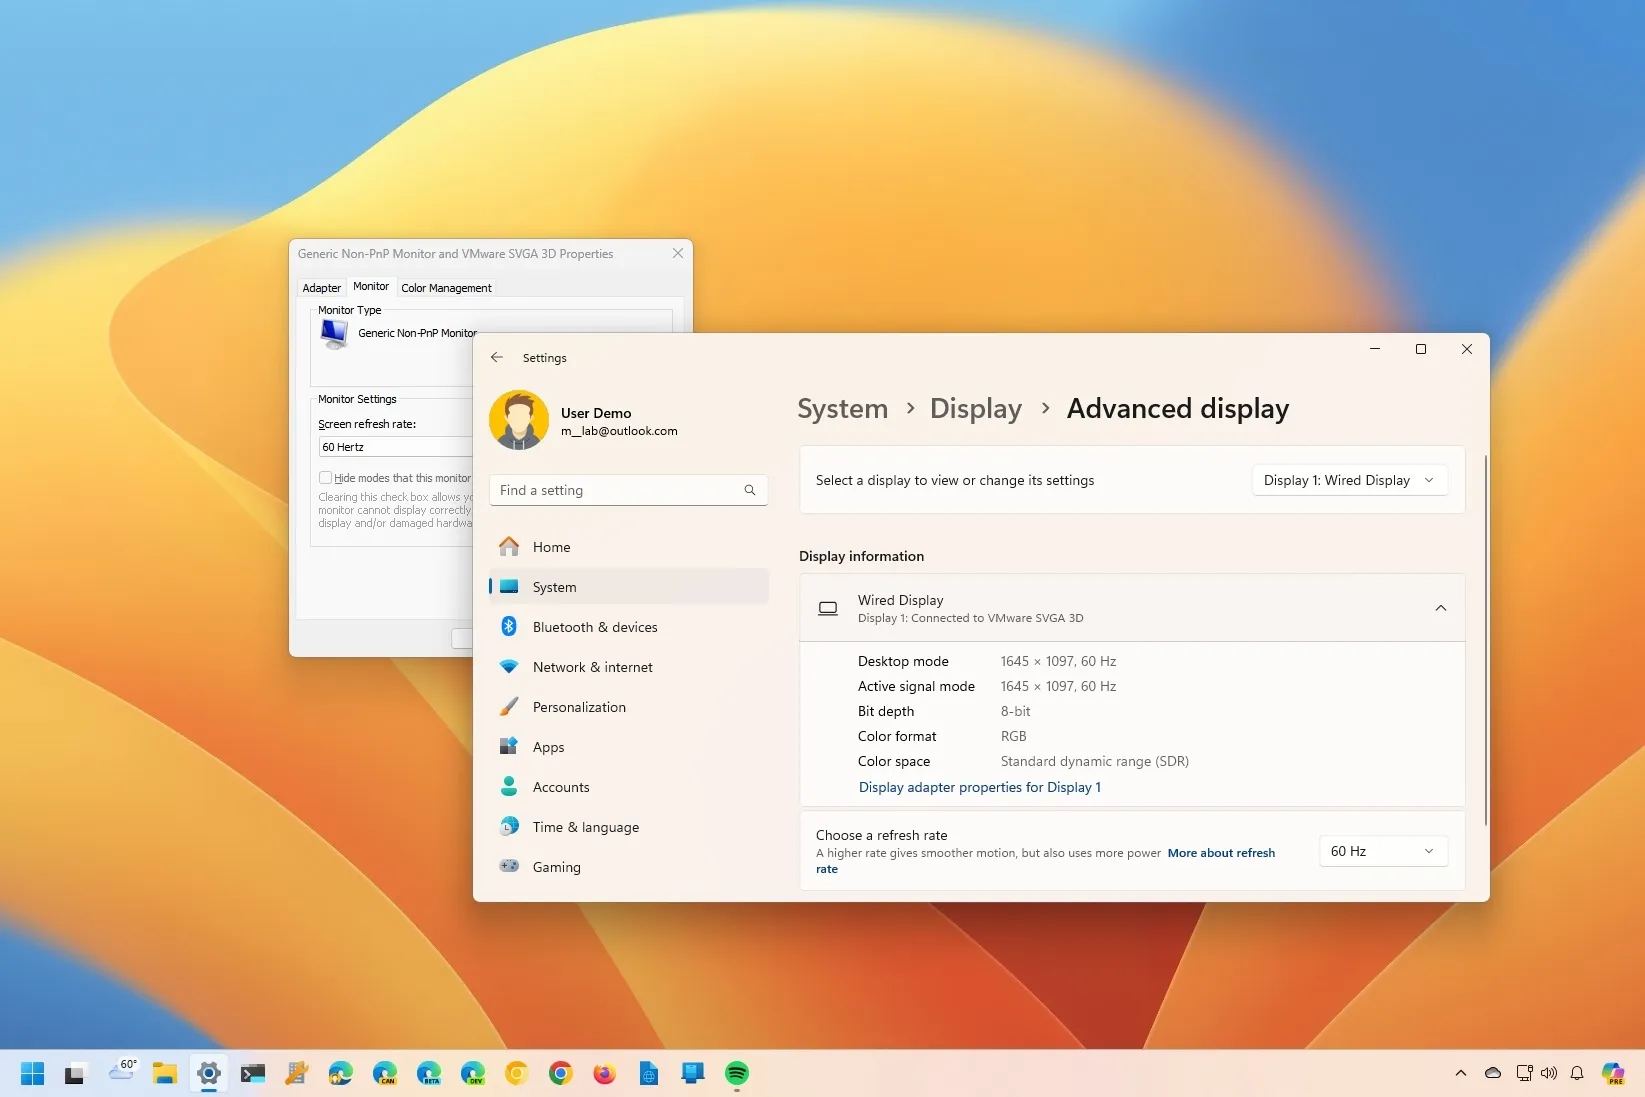
Check your current settings first. Open Settings and go to System > Display > Advanced display.
You’ll find the current refresh rate listed under the “Choose a refresh rate” dropdown menu. If it’s stuck at 60Hz, don’t panic. It simply means Windows isn’t utilizing the full potential of your monitor. You may also see a different value than expected. This could indicate a problem with your cable, drivers, or monitor settings. Write down the current setting before making any changes, just in case you need to revert.
Alternatively, you can access display settings through the older Control Panel. Search for 'Control Panel' in the Windows search bar, then navigate to Hardware and Sound > Display. Click 'Advanced display settings' and you’ll find the monitor refresh rate information there. The Control Panel method is a bit more convoluted, but some users still prefer it.
Updating Your Graphics Drivers
Old drivers often block high refresh rates. While Windows Update catches some, I prefer getting them directly from NVIDIA, AMD, or Intel to ensure the 2026 WDDM 4.0 features are active.
NVIDIA drivers can be found on their website, AMD drivers are available here, and Intel drivers can be downloaded from their support page. These direct downloads typically include the latest and most stable drivers. When installing, choose the "Custom’ installation option and enable the ‘Perform a clean installation" checkbox. This removes any remnants of older drivers that might be causing conflicts.
However, a clean driver install isn’t without risk. It can sometimes lead to temporary instability or even require you to reinstall other software. If you encounter issues after a clean install, you can try rolling back to a previous driver version. Display Driver Uninstaller (DDU) is a powerful tool for completely removing drivers, but use it with caution and always create a system restore point beforehand. It's a last resort, but can be incredibly effective.
how to change the refresh rate
Now for the main event. Open the Settings app, go to System > Display > Advanced display. Locate the “Choose a refresh rate” dropdown menu. If your monitor is properly connected and your drivers are up-to-date, you should see 165Hz listed as an option. Select it and click “Apply”. Windows will attempt to apply the new refresh rate. You may see a brief flicker or the screen go black for a moment – this is normal.
If 165Hz isn’t listed, double-check your cable connection and ensure you’re using a compatible port (DisplayPort is generally best). Also, verify that your monitor is actually capable of 165Hz through its on-screen display (OSD) menu. Some monitors require you to enable a specific mode or override setting to achieve the maximum refresh rate. If you’ve tried everything and 165Hz still isn’t showing up, try restarting your computer.
Sometimes, changing the refresh rate can cause flickering or a black screen. If this happens, immediately revert to your previous refresh rate. You can usually do this by pressing the Windows key + Ctrl + Shift + B to restart the graphics driver. If that doesn’t work, you may need to boot into Safe Mode to change the refresh rate back to a stable setting. It’s a pain, but it’s better than being stuck with an unusable display.
- Go to Settings > System > Display > Advanced display
- Locate the 'Choose a refresh rate' dropdown.
- Select 165Hz and click 'Apply'.
- If 165Hz isn't listed, check cable connections and monitor settings.
Troubleshooting Common Issues
Even after following these steps, you might encounter problems. Here are some common issues and how to address them. If 165Hz isn’t showing up in the dropdown, double-check your cable connection, monitor settings, and graphics drivers. Make sure your monitor is set to the correct input and that it’s actually capable of 165Hz.
Flickering or screen tearing can often be resolved by disabling V-Sync in your graphics card control panel or in-game settings. However, disabling V-Sync can introduce screen tearing, so it’s a trade-off. Adjusting in-game settings, such as lowering the graphics quality, can also help reduce flickering and tearing. A black screen after changing the refresh rate usually indicates a compatibility issue. Try reverting to your previous refresh rate or booting into Safe Mode.
If games aren’t running at 165Hz, verify that the game supports high refresh rates and that it’s set to run in fullscreen mode. Some games may require you to manually enable high refresh rate support in their settings menu. Also, ensure that your graphics card drivers are up-to-date and that you’ve selected the correct display adapter in the NVIDIA Control Panel or AMD Radeon Software.
Adaptive Sync: FreeSync & G-Sync
Adaptive sync technologies like AMD FreeSync and NVIDIA G-Sync work to eliminate screen tearing and stuttering by dynamically matching the monitor’s refresh rate to the frame rate output by your graphics card. This results in a smoother, more responsive gaming experience. If your monitor and graphics card both support FreeSync or G-Sync, enabling them is highly recommended.
To enable FreeSync, navigate to the AMD Radeon Software and enable 'Adaptive Sync'. For G-Sync, open the NVIDIA Control Panel and enable 'G-Sync' for your monitor. You may need to restart your computer after enabling either technology. Different G-Sync tiers exist – Basic offers variable refresh rate, Plus adds low latency, and Ultimate provides the best overall experience.
Using FreeSync or G-Sync in conjunction with a 165Hz monitor can significantly improve your gaming experience. However, it’s important to ensure compatibility and to follow the manufacturer’s instructions for enabling the technology. While these technologies are beneficial, they aren’t a substitute for a powerful graphics card and a high refresh rate monitor.
No comments yet. Be the first to share your thoughts!