
Unraveling the Mystery: What are Refresh Rates on Androids All About?
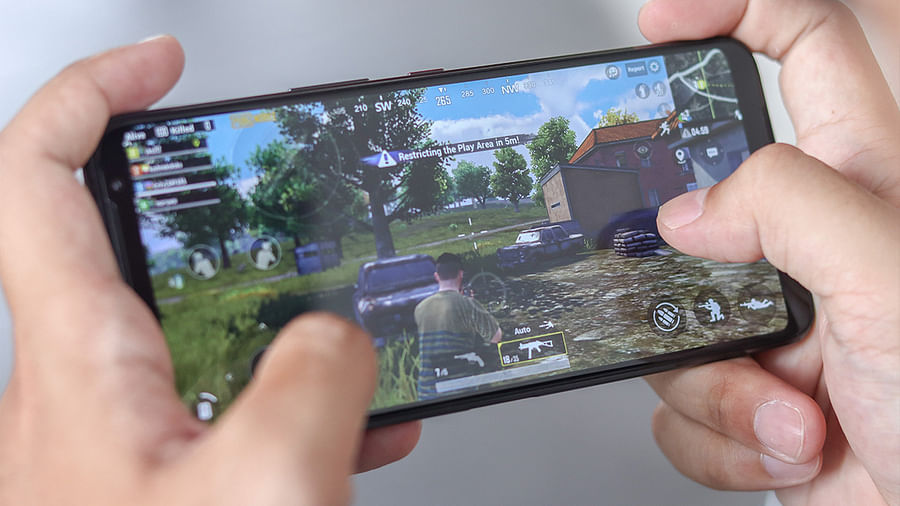
Ever wondered why your favorite action-packed game feels extra smooth on your friend's phone but jittery on yours? Or why that high-definition video playback isn't as seamless as you'd like? The secret lies in the realm of refresh rates. As the unsung hero of your Android experience, the refresh rate is the number of times your screen updates with new images each second. The higher the refresh rate, the smoother your gaming and video playback experience. But what's the best refresh rate for gaming on Android, and how does it play into the motion rate vs refresh rate debate?
Well, we're here to crack that code for you. This guide will not only help you understand the intricate dance between refresh rate vs fps, but also teach you how to optimize your Android's refresh rate for a truly immersive experience. So, are you ready to level up your Android screen optimization game? Let's dive in!
The Double-Edged Sword: Higher Refresh Rates, Smoother Visuals, Quicker Battery Drain?
Think of refresh rates as a magic show, where the magician is your Android device. The higher the refresh rate, the smoother the trick - or in our case, the motion on your screen. It's a spectacle, especially when it comes to the best refresh rates for gaming. But every magic show comes with a cost, and for your device, it's the battery life.
Imagine your screen as an enthusiastic artist, painting 60, 90, or even 120 frames every second. Each stroke, each frame, consumes energy. The more frames, the more energy needed. Hence, a higher refresh rate can be quite a drain on your battery. But, isn't the ultimate gaming experience worth a little compromise? Or is it? That's a decision only you can make.
Curious about the difference in performance? Check out our comparison of 60Hz vs 120Hz gaming. And if you're wondering about motion rate vs refresh rate, we've got you covered there too.
Correlation between Refresh Rates and Battery Life
Before You Leap: Essential Preparations to Boost Your Android's Refresh Rate
Before embarking on your quest to increase your Android's refresh rate, you'll need to be armed with the right gear. This isn't a journey for the faint-hearted or the ill-equipped. Your device should ideally have a high-resolution screen and a robust processor. Why, you ask? Higher refresh rates demand more from your device's hardware, so it's essential to ensure your Android can handle the load. Remember, the best refresh rates for gaming are often those that your device can manage without stuttering or overheating.
And let's not forget about software. Make sure your Android is running on the latest system update. Older versions may not support higher refresh rates, putting a damper on your quest. As for restrictions, some devices have locked refresh rates, making it impossible to increase them without voiding warranties or risking device damage. Do you know the difference between motion rate vs refresh rate? Or how refresh rate vs fps impacts your gaming experience? Brush up on these topics to optimize your screen refresh rate knowledge.
Finally, be aware of the power trade-off. Higher refresh rates can indeed provide smoother visuals, but they also guzzle more battery life. So, before you leap into action, make sure you've read our guide on making the most of your gaming monitor to understand the balance between performance and power consumption.
Before we dive into the step-by-step guide, let's make sure you're fully prepared. Here's a checklist of things you need to consider and prepare before attempting to increase refresh rates on your Android device:
Great, now that you've checked all the boxes, we can move on to the step-by-step guide on how to increase your Android device's refresh rate.
Your Roadmap to a Better Visual Experience: A Comprehensive Guide to Upping Your Android's Refresh Rate
Now that we've covered the basics of refresh rates and their impact on your Android device, let's dive into the practical steps you can take to increase your device's refresh rate. Remember, this process may vary slightly depending on your device model and the Android version it's running.
Boosting Your Android's Visual Performance: A Step-by-Step Guide to Increasing Refresh Rate


Learn more about Boost Your Android's Visual Performance: Step-by-Step Guide to Increasing Refresh Rate 📱💨 or discover other Refresh Rates Review guides.
Congratulations! You've successfully increased your Android device's refresh rate. Now, let's take a look at some example codes that can be used to further customize your refresh rate settings.
Code Snippet: Increasing Refresh Rate in Android
Here's an example of how you can increase the refresh rate on an Android device programmatically. We will be using Java, the primary language for Android development. Note that this method requires access to the current Window object, which you can usually get in an Activity context.
import android.content.Context;
import android.view.Window;
import android.view.WindowManager;

public void setRefreshRate(float rate, Window window) {
    WindowManager.LayoutParams params = window.getAttributes();
    params.preferredRefreshRate = rate;
    window.setAttributes(params);
}
In the above code, we first import necessary classes. We then define a method 'setRefreshRate' which accepts the desired refresh rate and a Window object as arguments. Inside this method, we get the current Window attributes, set the preferred refresh rate, and finally apply these new attributes back to the Window. Remember that the actual refresh rate might still be limited by the capabilities of the device's display.
Now that you have seen the code snippets, let's take a look at a practical demonstration of how to increase your Android device's refresh rate.
Now that you've seen the process in action, let's move on to some common issues you might encounter and how to troubleshoot them.
Stuck in a Rut? Troubleshooting Tips and FAQs to Keep You Moving
We understand that changing the refresh rate on your Android device can raise a lot of questions. Here, we've compiled a list of frequently asked questions to help you navigate this process.
Now that we've addressed some common queries, let's move on to assessing the results of your refresh rate changes.
The Moment of Truth: Evaluating the Impact of Your Refresh Rate Revamp
Stepping into the world of heightened refresh rates is akin to a gamer's rite of passage. You've just journeyed through the labyrinth of codes, and now it's time to reap the rewards. So, how do you assess the impact of your refresh rate revamp?
First, it's time to check your Android's new refresh rate. If everything has gone according to plan, your device's screen should feel significantly smoother, especially when it comes to gaming. Speaking of which, if you're interested in further optimizing your gaming experience, you might want to dive into the relationship between refresh rate and gaming performance.
Next, evaluate your device's overall performance. Notice any changes in battery life? A higher refresh rate can be more taxing on your battery, as we discussed in our guide on how refresh rates affect gaming performance. Finally, remember that perfect synchronization between refresh rate and fps is the real game-changer, a topic we dissect in our article on motion rate vs refresh rate.
So, did you notice a significant change? Is the world of high refresh rates everything you imagined and more? That's the beauty of tech—it's a never-ending journey of discovery, optimization, and above all, enjoyment. Welcome to the club, refresh rate guru!
Understanding Refresh Rates on Android Devices
Test your understanding of refresh rates and how to change them on your Android device.
Learn more about 📱 Understanding Refresh Rates on Android Devices 🔄 or discover other Refresh Rates Review quizzes.
Did you notice a significant change in your Android device's performance after increasing the refresh rate?
We're curious to know if you've noticed a substantial improvement in your device's performance after following our guide. Share your experience with us!


No comments yet. Be the first to share your thoughts!